Contact us

תודה על הפנייה, נציג יצור איתך קשר טלפוני בהקדם.
Oops! Something went wrong while submitting the form.
Please refresh and try again.
Please refresh and try again.
Exodus Wallet Guide
You can’t keep crypto in your pocket, under the floor tiles, or in a bank. To store cryptocurrencies, we use something called a digital wallet. A digital wallet is software, usually a mobile app, that allows you to store crypto securely without relying on any third party.
You can’t own crypto without a wallet, so the very first practical step when entering the crypto world is installing and setting up your own digital wallet. It’s a simple process that shouldn’t take more than ten minutes. In this guide, we’ll show you how to do it safely and responsibly, using the Exodus Wallet, one of the most popular wallets out there. Then, we’ll show you how to receive and send crypto from the wallet.
Exodus is a hot wallet. Users who want maximum security are advised to invest in a hardware wallet (cold wallet). Hardware wallets can be purchased at our branches or on the official importer’s website – Cryptoman.

As mentioned, we’ll use the Exodus Wallet – a free, easy-to-use wallet that supports many types of coins and tokens. Just go to your app store and search for Exodus.
Note: Some older mobile devices do not support the Exodus app and it may not appear in the app store. If you can’t install Exodus, we recommend downloading an alternative wallet app called Edge.
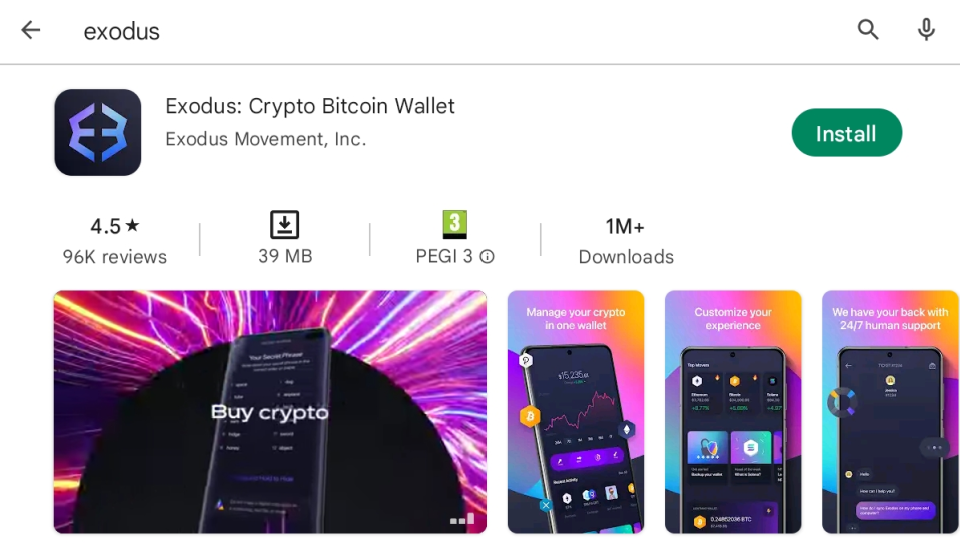

It’s easy!
Tap “Skip” until you reach the main screen and select:
Create New Wallet
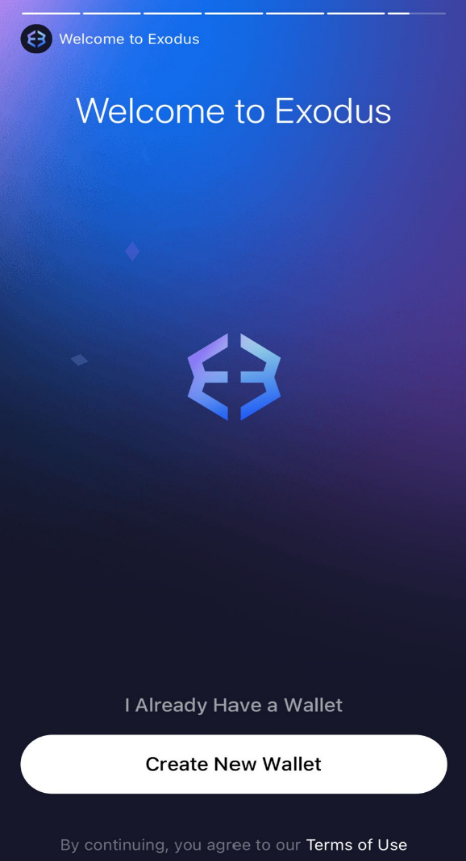
Now the home screen of the wallet will appear. Technically, the wallet is ready to use.
But before using it, there’s one very important step: Creating a backup.


This is the most important part of this guide. If you skip it, your funds won’t be safe.
What if one day your phone is stolen, breaks, or malfunctions? You don’t want to lose your crypto with it. That’s why it’s crucial to create a backup (Recovery Phrase) – a list of 12 or 24 words in English generated by the wallet.
With this phrase, you can fully restore your wallet on any device and regain access to your assets.
Anyone who holds the 12 or 24 words has full access to the wallet's funds.
If you lose access to the wallet and don’t have the recovery phrase – your funds are gone forever.
To create a backup, you’ll need two blank sheets of paper and a pen.
(Optionally, two envelopes and a stapler.)
You don’t need to understand the English words – just be able to copy the letters legibly.
If this is difficult, ask a close family member you trust completely for help.
Make sure to do the backup process at home, in private, away from cameras or people.
Exodus uses a 12-word recovery phrase.
Prepare your two sheets by numbering 1–12 in a column, from top to bottom.
On the backup screen, the words appear when you press and hold the purple bar (a).

Nowwrite the words in order. When you're done and double-checked everything, tap Done(b).
If you ever want to access the 12 words again:
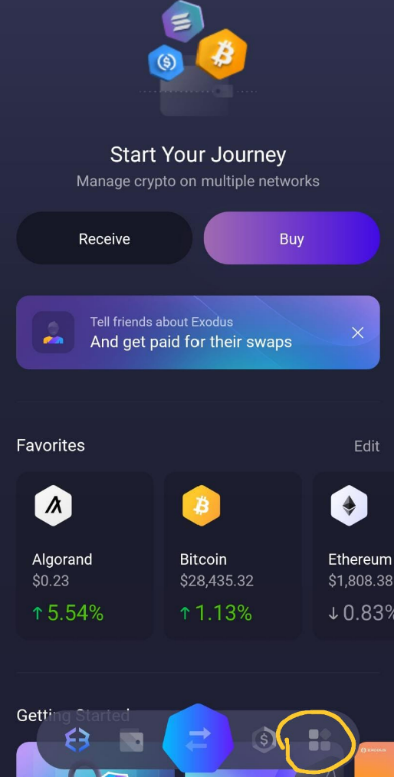
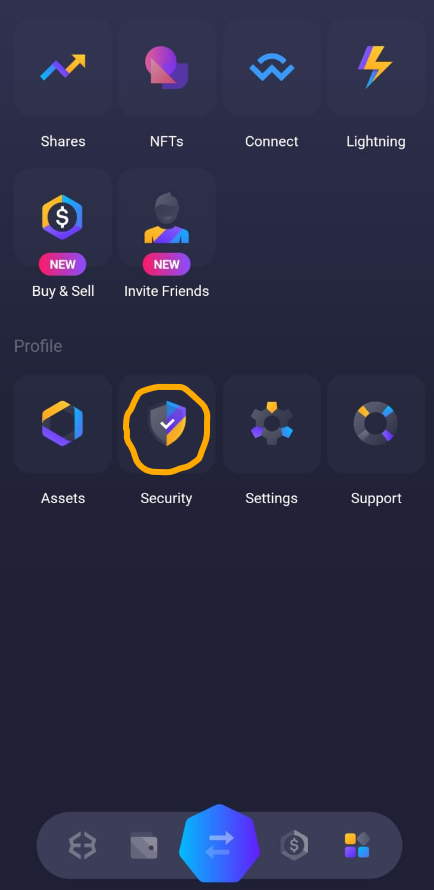
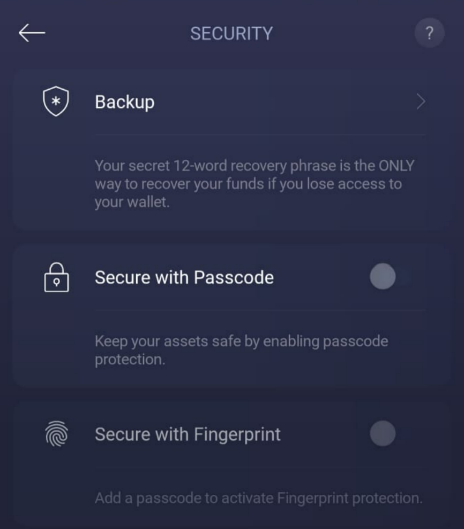
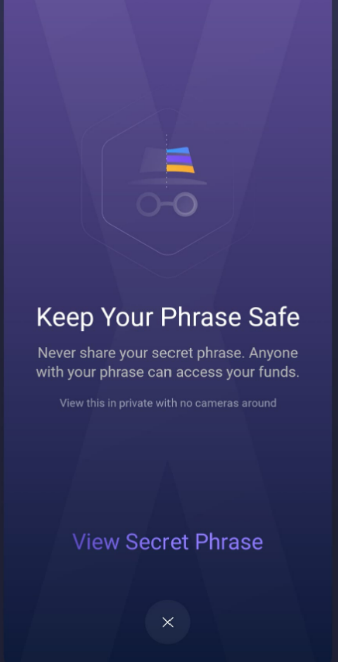
⚠️Important: Only tap View Secret Phrase in a secure and private location!
You’ll now see a blank numbered list and a purple text at the bottom:
Press and Hold to Reveal.
When you press it, the words appear. Once you let go, they disappear again.Write them down carefully on both sheets of paper.
🔒 Important Notes on Backup:
• NEVER share your backup phrase with anyone – not a person, not software.
The phrase = your money.
Anyone asking for your phrase is trying to scam you.
• The only reason to use the phrase is if you lose access to your wallet and need to restore it.
• It’s recommended to place each copy in a separate envelope. Write "DO NOT THROW AWAY!" and the date on it.
• Staple the envelope so you’ll know if it was opened (careful not to staple the paper inside).
• Store each envelope in a separate, secure, and hidden place.
• Write the words exactly in order: word 1 next to number 1, word 2 next to number 2, etc.
• Copy the words letter by letter – do not rely on your spelling.
• There’s no difference between uppercase and lowercase.
• Double-check accuracy by comparing both copies and the wallet screen – do it at least twice.
• Never photograph or store your backup digitally – not in email, WhatsApp, Google Docs, or desktop.
Keep it offline and physical only.
• Your backup is your money. The more crypto you hold – the more valuable your backup is.
Don’t lose it!
• If you’re holding significant sums, consider using a steel backup kit, which is durable, waterproof, and fire-resistant – unlike paper backups.
If you’ve written and stored the backup safely, it’s time to start receiving crypto!

Just like email, to receive crypto you need an address.
Each coin has its own address (sometimes multiple ones), all leading to the same wallet.
For example, to receive Bitcoin, you need your Bitcoin address, which you then give to the sender.
To find it:
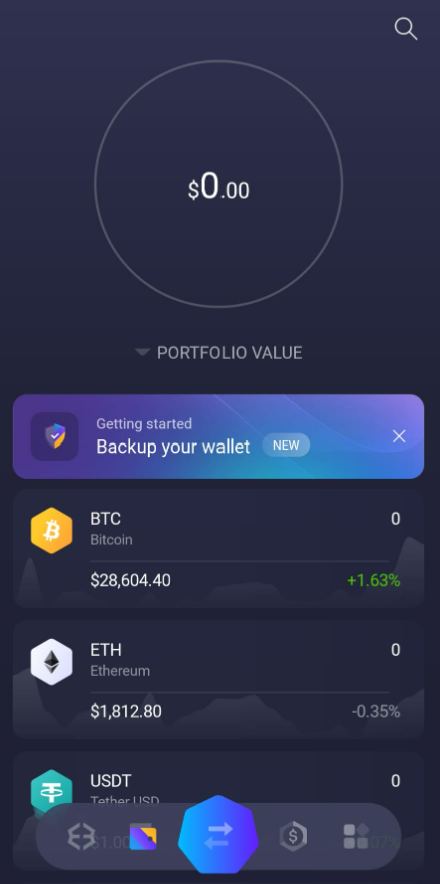
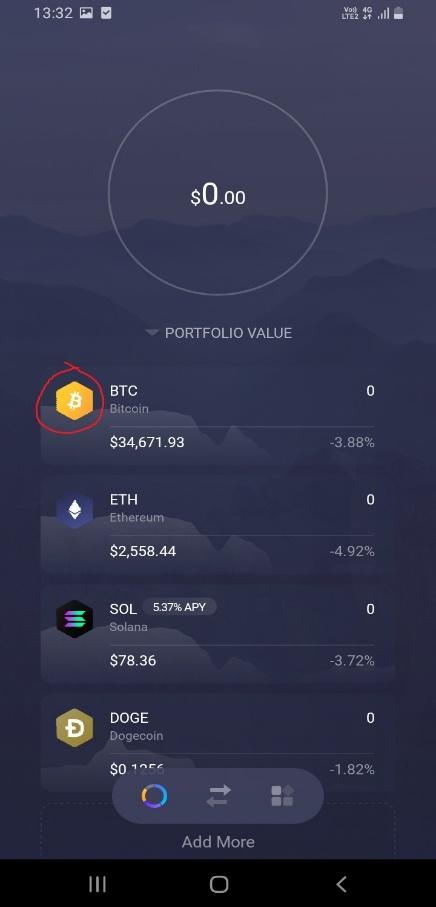
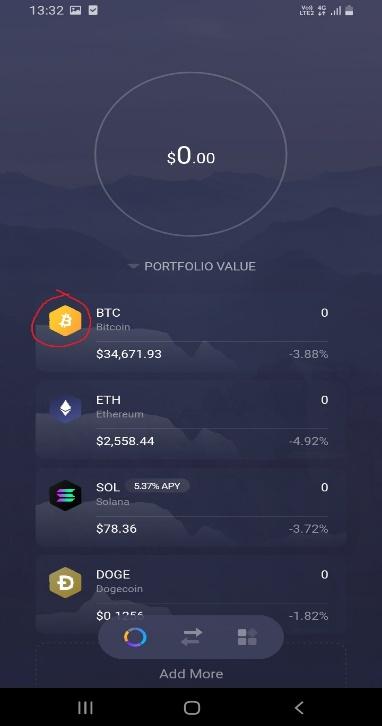
Tap the logo of the coin you want to receive (e.g., Bitcoin):
Tap Receive (the downward arrow):

You’ll now see your public wallet address:

There’s both a QR code and a text string of letters and numbers.
They are the same – scanning the QR will show the text version, which is your public address.
📥 Tips for Receiving Crypto:
• Always send both the QR code and the text address.
Never type the address manually.
• If you’re sending the address (e.g., via email), double-check it – make sure no characters were accidentally deleted or changed.
• Make sure you are sending the correct address for the correct coin and network.
• Before sending the full amount, ask the sender to send a small test amount first.
Once it arrives safely, proceed with the rest.
• Sending to the wrong address means losing your funds.
Crypto transactions are irreversible!
• After crypto is sent to your address, the transaction will appear in your wallet with the status “Receiving”.
This is what it looks like

This means it hasn’t yet been confirmed on the blockchain.
Even if the balance shows an increase in USD – the funds are not yet truly yours.
Once confirmed, the status will change to “Received”.
⚠️ Only treat a payment as final once the status is Received. Until then, there's still a risk the funds won’t arrive.

To send crypto, you’ll need the recipient’s address.
Ask for it in text format and copy-paste it only – do not type it manually.
To send:
Tap the coin you want to send.
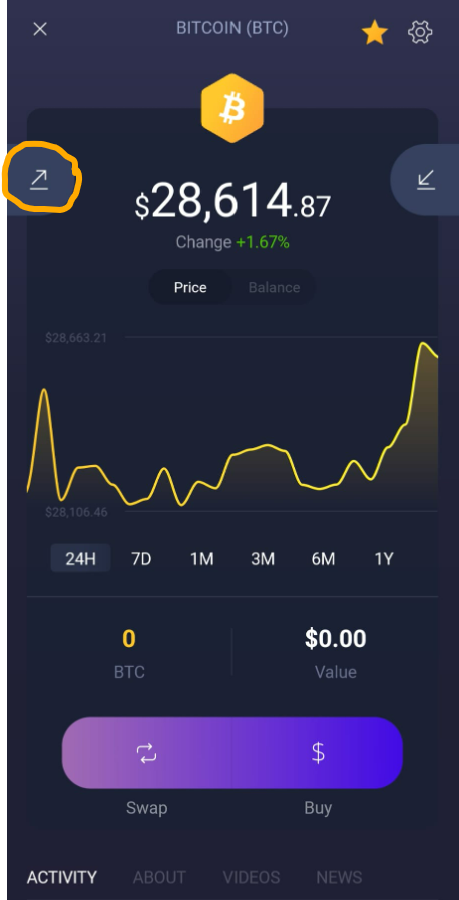
Tap Send (the upward arrow):
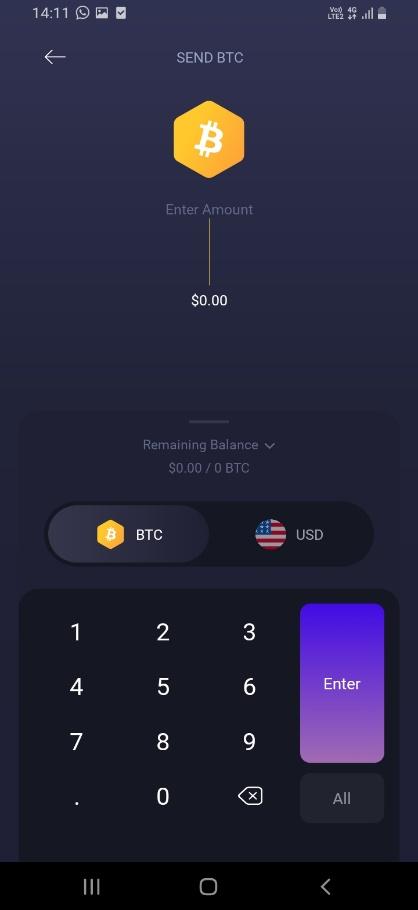
Next, choose the amount to send.
By default, it’s shown in the coin’s unit (e.g., BTC). If you prefer to enter a dollar amount, tap USD and type the dollar value.
If you want to send your entire balance, tap All.
After entering the amount, you'll need to input the address you're sending to. There are two ways to do this.
One way is to scan a QR code – this is the easiest method if you have another device displaying the barcode.
Usually, we’ll use the text address – after copying it, simply tap the address bar:
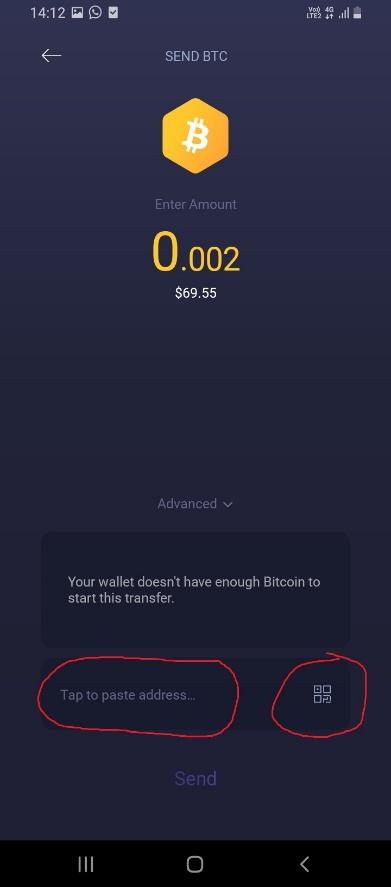
Then tap Send.
On the next screen, drag the arrow in the direction of the purple arrows to confirm and complete the transaction:
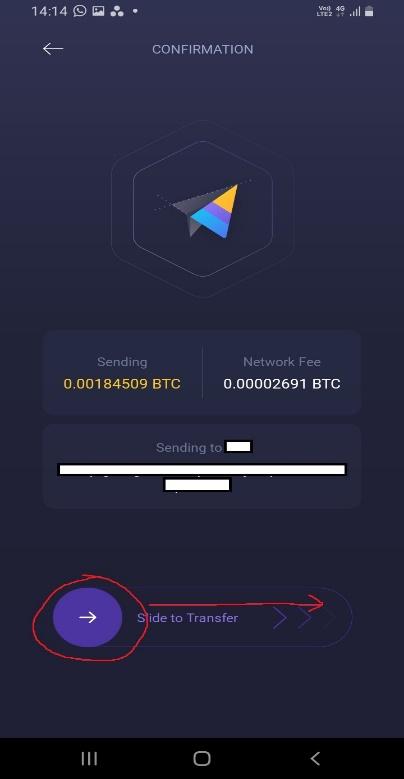
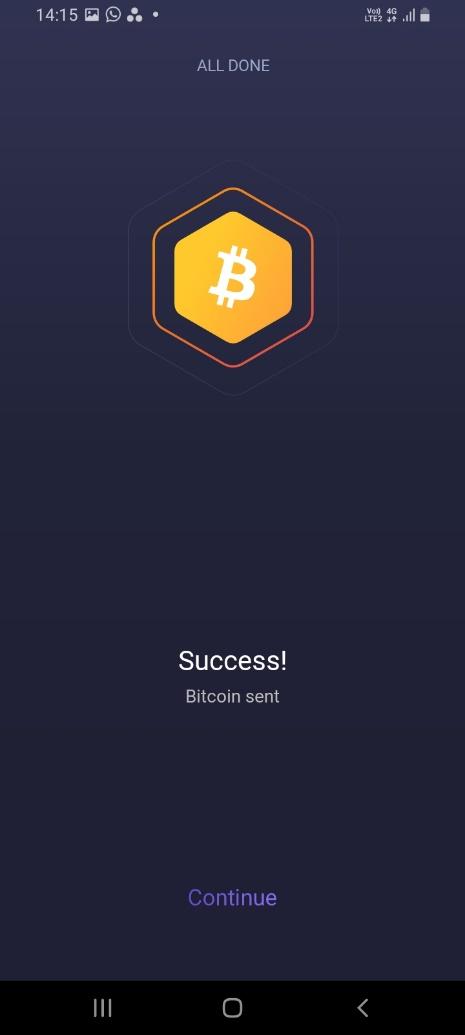
This is your opportunity to double-check that the transaction details are correct.If the address and the amount are accurate, you can go ahead and send.Slide the purple button all the way to the right to complete the transaction.After sending, you’ll see a confirmation screen showing that the transaction was successfully sent.
Using a digital wallet is, overall, quite simple.
With a bit of patience and a willingness to learn, almost anyone can manage and use their crypto independently.
The Exodus Wallet allows you to perform many additional actions not covered in this guide – we highly recommend visiting the company’s website and reading their detailed tutorials: https://www.exodus.com
If you need help, you’re welcome to visit one of Bitcoin Change’s branches.
Our support staff will be happy to assist you with anything you need – from setting up the wallet to receiving and sending crypto.
The only part of the process where our representatives cannot assist you is with creating the backup, since this is sensitive information meant for your eyes only.
Wishing you safe and enjoyable use!